
‘Tis the season for British Asparagus – Hoorah!
Traditionally, the British asparagus season runs from St George’s Day on 23rd April right through to Summer Solstice on 21st June. We are very lucky that we have an established asparagus bed at the bottom of our garden, that was planted before we moved into our house and this time every year we get an abundance of the stuff.
Nutritional Info…
Asparagus is a member of the lily family, it is low in calories and carbohydrates, but relatively rich in protein compared to other vegetables. It is an excellent source of potassium, vitamin K, folic acid, vitamins C and A, riboflavin, thiamine and vitamin B6. It is a very good source of niacin, phosphorus, iron and as mentioned, protein. It is rich in prebiotic dietary fibre which is munchies for your gut bacteria, so they will thank you for it. < jump to recipe>
Issues and safety…
As you well know, eating Asparagus has a strange affect on your urine, more so for some people than others, it can give off a strong, characteristic odour! The main culprit for this is the asparagusic acid, which is found exclusively in asparagus. When you eat asparagus, the asparagusic acid gets broken down into sulphur containing byproducts, and when you wee, this byproduct almost immediately evaporates – voila! stinky wee! Asparagus also contains a moderate amount of purines. Purines are substances that are found in animal and plant based foods, that your body converts into uric acid. If you have issues with your kidneys, this can build up in your blood stream and be deposited as needle-shaped crystals in your joints, therefore if you suffer from gout, you should be aware and not consume too much Asparagus.
Cooking Asparagus…
Asparagus doesn’t need much prepping and cooking. Just bend the stalk and it should snap off where it is woody and give them a good wash. I do mine in my steamer for as little as 5 minutes, less if they are thin ones and in a stir fry I slice on the slant and add them towards the end and stir fry for only a couple of minutes. To roast, I toss in olive oil and season with freshly milled sea salt and black pepper, place them on a baking tray and cook in a very hot oven (200/220 degrees) for no more than 5 minutes. My favourite way of eating them is crispy baked. I discovered this when I had some batter and bread crumbs left after I had made some ‘tofish’ fingers. I simply dipped them in the batter then tossed them in the breadcrumbs, put them on a baking tray, drizzed with olive oil and baked in a hot oven for 5 minutes. I just recently made them again and this time I added some nutritional yeast to the breadcrumbs, they were delicious.
Recipe…
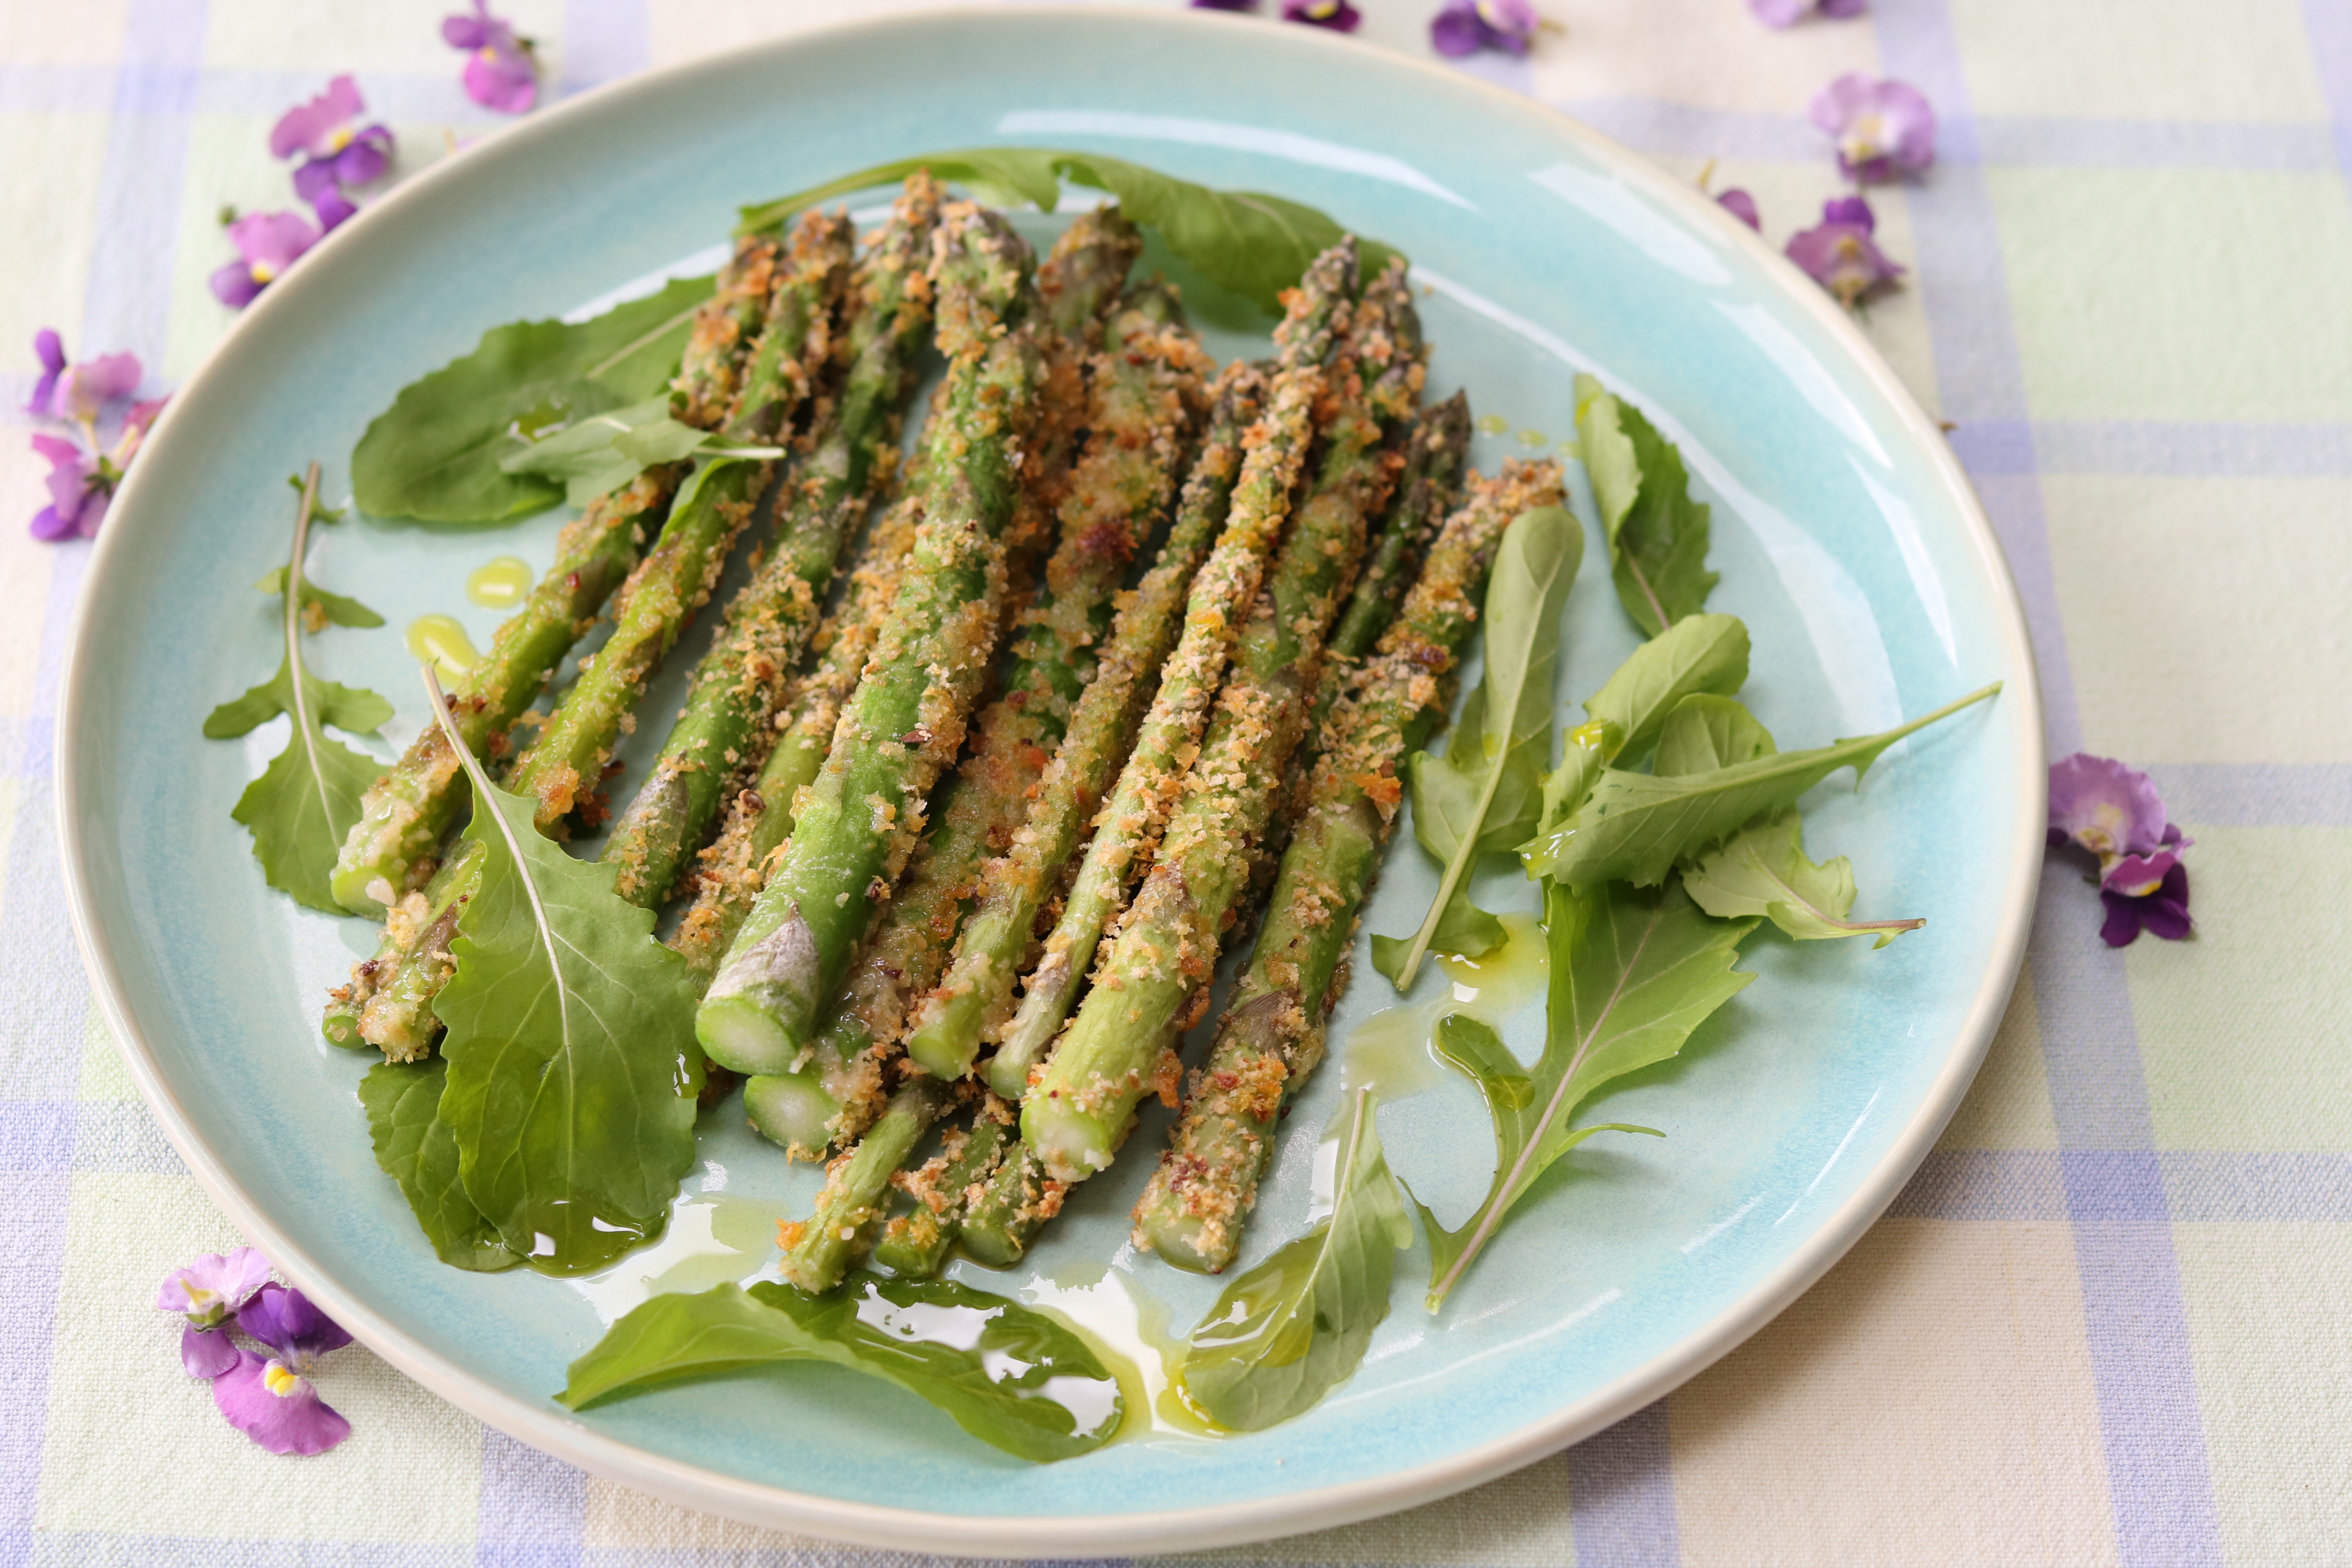
Crispy ‘cheezy’ Baked Asparagus
This simple way of cooking asparagus is delicious, it’s crispy and has that umami/cheesy flavour you get with nutritional yeast. Have it as a snack or a side dish, on its own or dip into some vegan mayo!
utensils required ~ baking tray
Ingredients:
- a bunch of asparagus (approx 12)
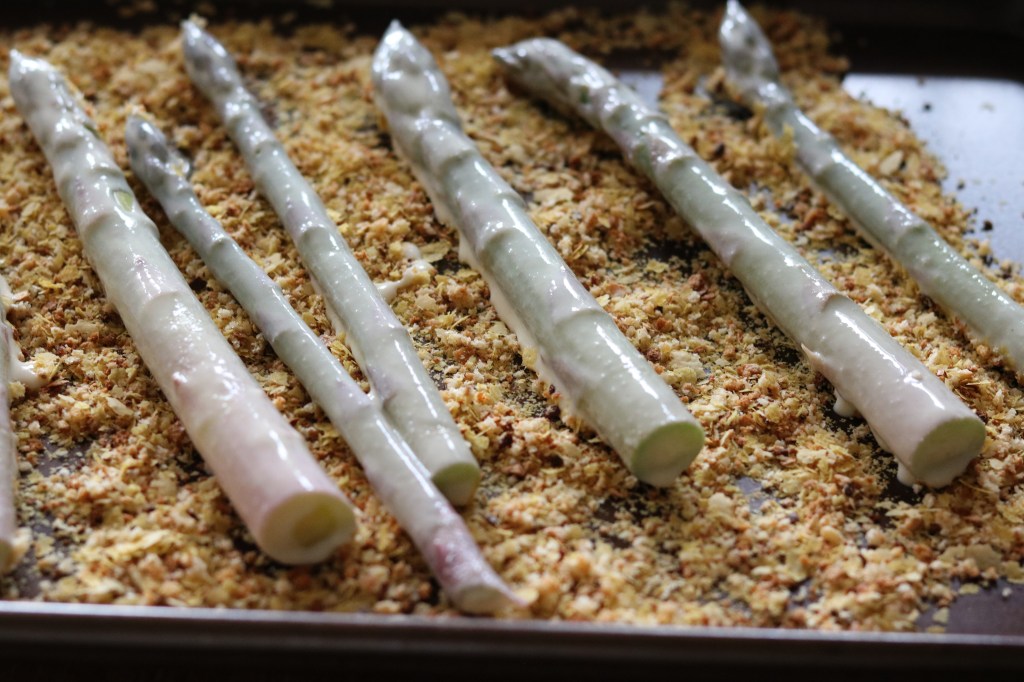
- 20g of breadcrumbs, preferably ‘panko’ style (see notes at the end of this recipe on making your own gf breadcrumbs)
- 10g nutritional yeast
- Olive oil, for drizzling
- Maldon Sea salt flakes and freshly ground black pepper for sprinkling
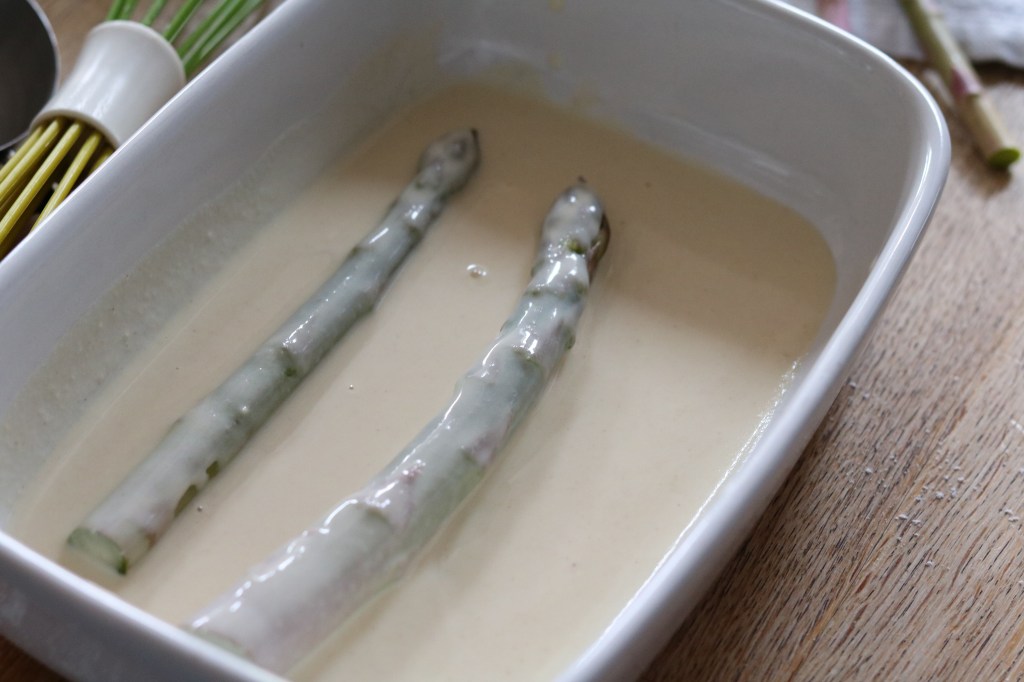
for the batter:
- 60g plain flour (I use Dove farm Gluten free)
- 75ml soya milk
- 1/2 tsp garlic powder
- 1/2 tsp onion powder
Method:
- Preheat oven to 200c fan/200c/gas mark 6
- Make the batter – add the batter ingredients to a bowl and whisk together, put in a oblong dish, this makes it easier to coat the asparagus.
- Prepare the asparagus – break off woody bit, wash and dry on an old tea towel
- In another bowl, mix together the breadcrumbs and nutritional yeast and put on a flat plate or tray, this will make it easier to roll the asparagus in the mixture.
- Assemble your asparagus – dip in the batter, roll in the breadcrumb mixture and place of a baking tray.
- Drizzle with olive oil, sprinkle with the salt and pepper and then place in the oven for 5 minutes.

Notes~ I make my own gluten free bread crumbs using slices of Schar seeded loaf, I simply whizz in a food processor and if I want them ‘panko’ style I put them on a tray and bake in the oven (180c) for a 2-4 minutes, give them a little shake half way and do keep an eye on them as they brown quite quickly.
Recipe by Sally Wilson ~ Natural Vegan Chef

